
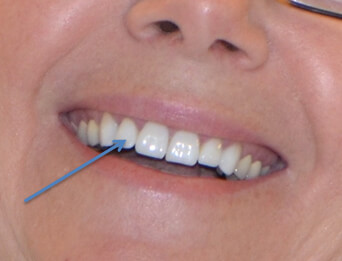
Everyone sees you’re front teeth on a daily basis when you smile and when you talk. So what happens when one needs to be repaired? Fixing a front tooth with a dental implant requires detailed planning from start to finish to achieve an esthetic, functional and long lasting result. The case below will show these steps from start to finish.
It features a person with a high smile line, meaning when they smile you can see both the teeth and the gums. This type of smile line requires careful management of the gums and bone. This individual also has very white teeth which requires custom shading on the final crown.
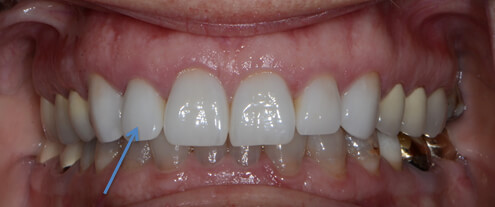
Photo: The blue arrow shows the tooth that will be removed and replaced.
Broken Tooth
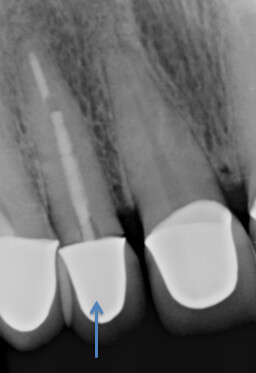
The X-Ray shows the tooth that needs to be replaced as it was fractured at the gum line and was temporarily re-attached until it was treated.
Digital Photography and 3D Planning
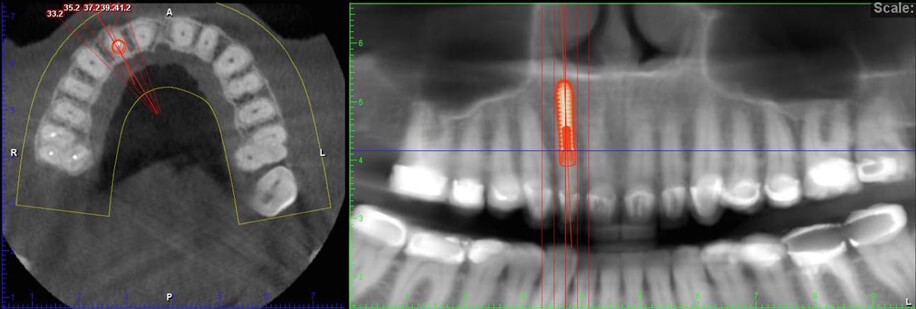
The planning process starts with digital photography and a CT scan in our offices. The photography allows the dentist to do a “digital smile design.” The CT Scan (in the photos)), allows for precise planning of the implant position in the bone.
In this case, the individual was able to have the tooth extracted and the implant placed on the same day. This is a wonderful benefit because it means the individual only requires ONE surgery and that they will be done with treatment faster.
Surgery and Temporary Crown
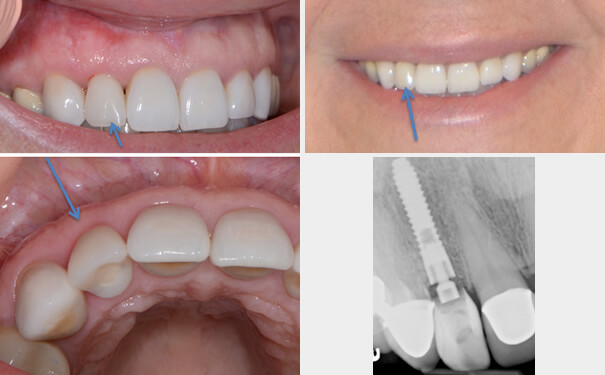
The first step is the surgery – the tooth is removed and the implant placed on the same day. After the surgery, a temporary crown is used for several months until the implant is fully healed.
Final Restoration and Custom Work
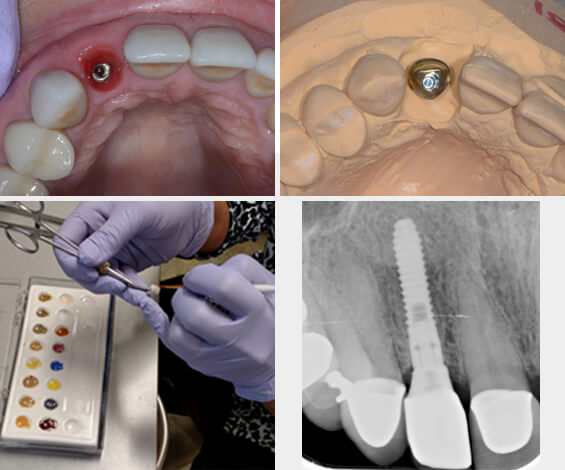
Once the implant is healed, the temporary crown is removed. Then the final abutment and crown is tried in. Next it is custom shaded to match the color of the persons other teeth.

Once the final crown is in place, the implant restoration both looks and feels like a natural tooth. The final result looks like the tooth has always been a part of the individual’s mouth!

